Quick Startfor Web Application
ログイン画面を追加し、ログイン認証後、ユーザ管理画面が表示されるように機能を追加します。
- Eclipseでfalcon_web_tutorial/WEB-INF/falcon/app.xmlファイル(以下app.xmlファイル 66行目あたりから)を開き、リスト 3-4のように修正を行います。
<w:popup name="maskPopup" template="popupmask"/> <w:screen name="top" template="top"> <w:pane name="title" initial="title"/> <!-- ↓TOP画面にログイン画面を指定します --> <w:pane name="main" initial="loginForm"/> </w:screen> <w:panel name="title" template="title"> </w:panel> 〜 省略 〜 <w:form name="searchForm"> <w:field header="ユーザID" name="user_id" type="text" maxlength="128" size="40"/> <w:field header="名前" name="user_name" type="text" maxlength="128" size="40"/> <w:command name="search" command="searchUser" type="button" text="検索"/> </w:form> <w:form name="loginForm" header="ユーザ認証"> <!-- ↓入力フィールドの定義です --> <w:field header="ユーザID" name="user_id" type="text" maxlength="128" size="40"/> <w:field header="パスワード" name="password" type="password" maxlength="128" size="40"/> </w:form> </w:application>リスト 3-4 app.xmlファイル(76行目あたりから)
- ブラウザで以下のURLにアクセスし、app.xmlファイルの修正内容を反映します。修正内容反映後、図 3-3の画面が表示されます。
http://localhost:8080/tutorial/?control=init
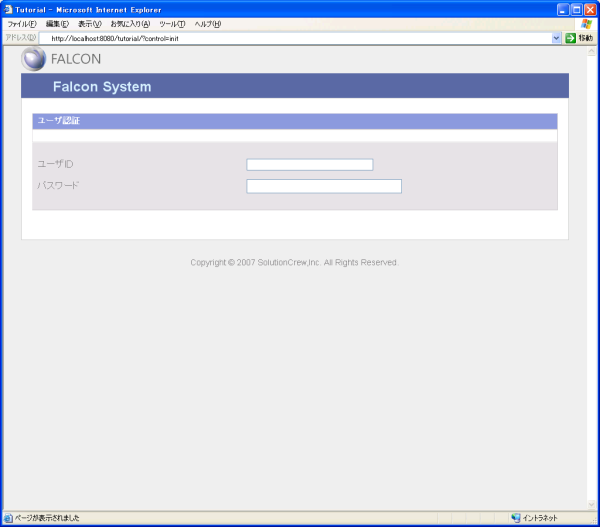
図 3-3
- Eclipseでdb.xmlファイルを開き、以下の修正を行います。
<?xml version="1.0" encoding="Windows-31J"?>
<db:db
    xmlns:f="http://www.scw.co.jp/falcon"
    xmlns:db="http://www.scw.co.jp/falcon/db"
    name="falcon"
    connection="falcon">

    <db:connection name="falcon" driver="org.postgresql.Driver"
        uri="jdbc:postgresql:falcon" user="falcon" password="falcon"/>

    <db:table name="m_user" desc="ユーザマスタ">
        <db:column name="ID" desc="ID"
            size="36" type="CHAR" notNull="true" primaryKey="true"/>
        <db:column name="VERSION" desc="VERSION番号"
            size="10" type="INT" notNull="true"/>
        <db:column name="user_id" desc="ユーザID"
            size="128" type="VARCHAR" notNull="true"/>
        <db:column name="password" desc="ログインパスワード"
            size="128" type="VARCHAR" notNull="true"/>
        <db:column name="user_name" desc="名前"
            size="128" type="VARCHAR" notNull="false"/>
        <db:column name="mail" desc="メールアドレス"
            size="128" type="VARCHAR" notNull="false"/>
        <db:column name="zip" desc="郵便番号"
            size="7" type="VARCHAR" notNull="false"/>
        <db:column name="address" desc="住所"
            size="256" type="VARCHAR" notNull="false"/>
        <db:column name="tel" desc="電話番号"
            size="11" type="VARCHAR" notNull="false"/>
        <db:column name="birthday" desc="誕生日"
            size="8" type="VARCHAR" notNull="false"/>
        <db:index name="user_id" desc="ユーザIDのユニークインデックス"
            column="user_id" unique="true"/>
    </db:table>

    <db:mapping name="userMap" table="m_user" key="ID" version="VERSION">
        <db:field column="user_id" as="user_id"/>
        <db:field column="password" as="password"/>
        <db:field column="user_name" as="user_name"/>
        <db:field column="mail" as="mail"/>
        <db:field column="zip" as="zip"/>
        <db:field column="address" as="address"/>
        <db:field column="tel" as="tel"/>
        <db:field column="birthday" as="birthday"/>
        <db:where>
            <db:and>
                <db:eq column="user_id" field="user_id"/>
                <db:eq column="user_name" field="user_name"/>
            </db:and>
        </db:where>

        <db:find name="login">
            <db:where>
                <db:and>
                    <db:eq column="user_id" field="user_id" force="true"/>
                    <db:eq column="password" field="password" force="true"/>
                </db:and>
            </db:where>
        </db:find>

        <!-- ↑ユーザ認証時に使用するマッピングを定義します -->
    </db:mapping>

</db:db>
リスト 3-5 db.xmlファイル
- Eclipseでapp.xmlファイルを開き、以下の修正を行います。
<w:popup name="maskPopup" template="popupmask"/> <w:screen name="top" template="top"> <w:pane name="title" initial="title"/> <w:pane name="main" initial="loginForm"/> <w:event command="loginSuccess"> <w:changeWidget name="main" widget="mainPanel"/> </w:event> <!-- ↑ユーザ認証成功後、ユーザ管理画面を表示します --> </w:screen> <w:panel name="title" template="title"> </w:panel> 〜 省略 〜 <w:form name="searchForm"> <w:field header="ユーザID" name="user_id" type="text" maxlength="128" size="40"/> <w:field header="名前" name="user_name" type="text" maxlength="128" size="40"/> <w:command name="search" command="searchUser" type="button" text="検索"/> </w:form> <w:form name="loginForm" header="ユーザ認証"> <w:field header="ユーザID" name="user_id" type="text" maxlength="128" size="40"/> <w:field header="パスワード" name="password" type="password" maxlength="128" size="40"/> <w:command name="login" command="loginUser" type="submit" text="ログイン"/> <!-- ↑ログインボタンの定義です --> <w:event command="loginUser" parameter="/data"> <st:set to="/result"> <dao:find dao="userMap" name="login" condition="/data"/> </st:set> <st:set to="/count"> <st:count expression="/result"/> </st:set> <st:if condition="/count > 0"> <st:then> <w:fireEvent command="loginSuccess"/> </st:then> <st:else> <w:setWidgetParameter error="'ログインに失敗しました。'"/> </st:else> </st:if> </w:event> </w:form> </w:application>リスト 3-6 app.xmlファイル(66行目付近から)
- ブラウザで以下のURLにアクセスし、db.xml、app.xmlファイルの修正内容を反映します。
修正内容変更後、図 3-4の画面が表示されます。
http://localhost:8080/tutorial/?control=init
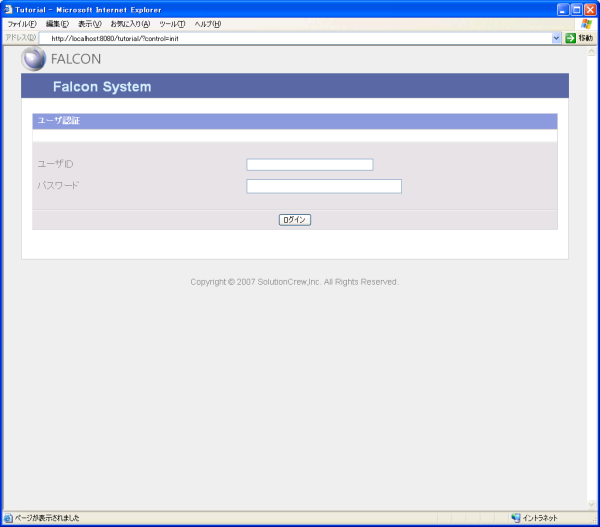
図 3-4
- Eclipseでapp.xmlファイルを開き、以下の修正を行います。
<w:popup name="maskPopup" template="popupmask"/> <w:screen name="top" template="top"> <w:pane name="title" initial="title"/> <w:pane name="main" initial="loginForm"/> <w:event command="loginSuccess"> <w:changeWidget name="main" widget="main"/> </w:event> <w:event command="logout"> <w:changeWidget name="main" widget="loginForm"/> </w:event> <!-- ↑ログアウトメニュー押下時のイベント定義です --> </w:screen> <w:panel name="title" template="title"> </w:panel> <w:menu name="menu" template="titlemenu"> </w:menu> <w:panel name="main"> <!-- ログアウトメニューをTOP画面に表示します --> <w:unit name="logout" initial="logoutMenu"/> <w:unit name="searchForm" initial="searchForm"/> <w:unit name="userList" initial="userList"/> <w:event command="insertUser"> <w:changeWidget name="userForm" widget="userForm" mode="insert"/> </w:event> <w:event command="updateUser" parameter="/data"> <w:changeWidget name="userForm" widget="userForm" mode="update" key="{ID=/data/id}"/> </w:event> <w:event command="deleteUser" parameter="/data"> <w:changeWidget name="userForm" widget="userForm" mode="delete" key="{ID=/data/id}"/> </w:event> <w:event command="afterEditUser"> <w:updateWidget name="userList"/> <w:deleteWidget name="userForm"/> </w:event> <w:event command="afterCancelUser"> <w:deleteWidget name="userForm"/> </w:event> <w:event command="searchUser" parameter="/data"> <w:changeWidget name="userList" widget="userList" condition="/data"/> </w:event> </w:panel> 〜 省略 〜 <w:form name="loginForm" header="ユーザ認証"> <w:field header="ユーザID" name="user_id" type="text" maxlength="128" size="40"/> <w:field header="パスワード" name="password" type="password" maxlength="128" size="40"/> <w:command name="login" command="loginUser" type="submit" text="ログイン"/> <w:event command="loginUser" parameter="/data"> <st:set to="/result"> <dao:find dao="userMap" name="login" condition="/data"/> </st:set> <st:set to="/count"> <st:count expression="/result"/> </st:set> <st:if condition="/count > 0"> <st:then> <w:fireEvent command="loginSuccess"/> </st:then> <st:else> <w:setWidgetParameter error="'ログインに失敗しました。'"/> </st:else> </st:if> </w:event> </w:form> <w:menu name="logoutMenu"> <w:item name="logout" command="logout" type="link" text="ログアウト"/> </w:menu> <!-- ↑ログアウト用リンクを作成します --> </w:application>リスト 3-7 app.xmlファイル(66行目付近から)
- 3. ブラウザで以下のURLにアクセスし、db.xml、app.xmlファイルの修正内容を反映します。
修正内容変更後、ログインを行うと図 3-5のように画面左上にログアウトメニューが表示されます。
ログアウトメニューを押下することで、ログイン画面に切り替わります。
http://localhost:8080/tutorial/?control=init
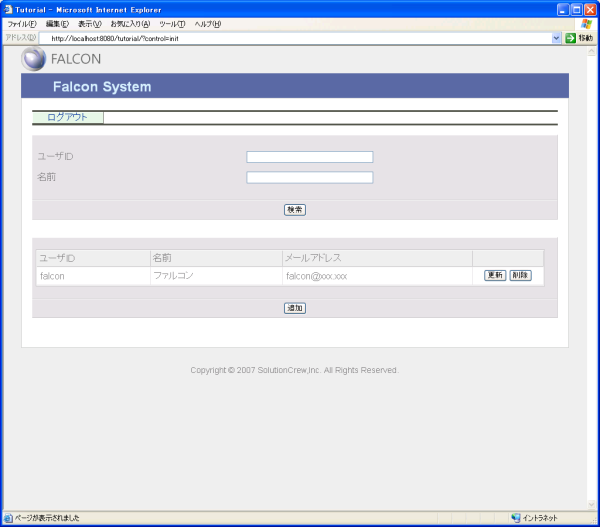
図 3-5
それでは、Falconを楽しんでください!!!