Quick Startfor Web Application
2.2.4で作成したm_userテーブルの1レコードの編集(追加、更新、削除)を行う画面を作成します。
- Eclipseでfalcon_web_tutorial/WEB-INF/falcon/app.xmlファイル(以下app.xmlファイル 79行目あたりから)を開き、リスト 2-5のように修正を行います。
    <w:panel name="mainPanel">
        <w:unit name="userForm" initial="userForm"/> <!--←TOPページを指定します -->
    </w:panel>


    <w:form name="userForm">
        <!-- ↓データソースを指定します -->
        <w:dataSource dao="userMap"/>

        <!-- ↓入力フィールドの定義です -->
        <w:field header="ユーザID" name="user_id"
            type="text" maxlength="128" size="40"/>
        <w:field header="パスワード" name="password"
            type="password" maxlength="128" size="40"/>
        <w:field header="名前" name="user_name"
            type="text" maxlength="128" size="40"/>
        <w:field header="メールアドレス" name="mail"
            type="text" maxlength="128" size="40"/>
        <w:field header="郵便番号" name="zip"
            type="text" maxlength="7" size="10"/>
        <w:field header="住所" name="address"
            type="textarea" col="40" row="5"/>
        <w:field header="電話番号" name="tel"
            type="text" maxlength="11" size="10"/>
        <w:field header="誕生日" name="birthday"
            type="text" maxlength="8" size="10"/>

        <!-- ↓「追加」「更新」「削除」「OK」「キャンセル」ボタンの定義です -->
        <w:commandBox name="edit">
            <w:insert type="button" text="追加"/>
            <w:update type="button" text="更新"/>
            <w:delete type="button" text="削除"/>
            <w:ok type="button" text="OK"/>
            <w:cancel type="button" text="キャンセル"/>
        </w:commandBox>
    </w:form>
リスト 2-5 app.xmlファイル(79行目あたりから)
- ブラウザで以下のURLにアクセスし、app.xmlファイルの修正内容を反映します。修正内容反映後、図 2-7の画面が表示されます。
http://localhost:8080/tutorial/?control=init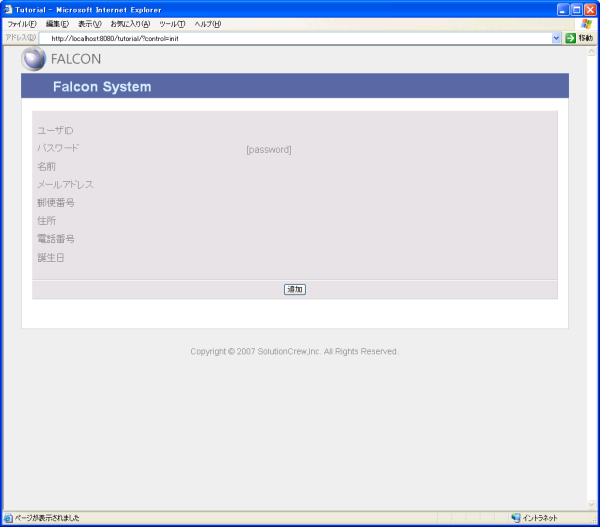
図 2-7 - マッピングの確認
ユーザ編集画面を使用してデータの追加を行います。図 2-7の[追加]ボタンを押下し、図 2-8の画面を表示します。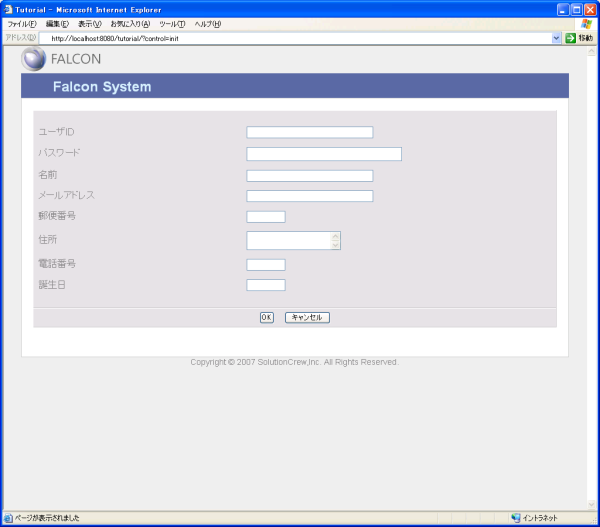
図 2-8 - 各項目に値を入力し、[OK]ボタンを押下します。
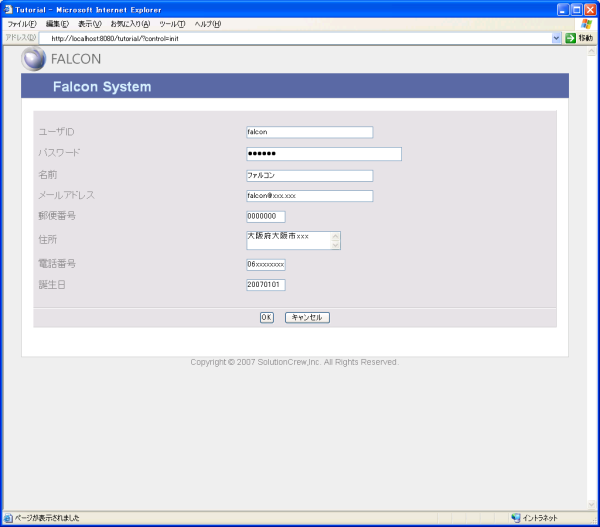
図 2-9 - データベースのデータ確認
コマンドプロンプトで以下のコマンドを実行します。$ cd <path to postgreSQL bin directory> $ psql -U falcon -d falcon Password for user falcon: falcon Welcome to psql 8.1.3, the PostgreSQL interactive terminal. Type: \copyright for distribution terms \h for help with SQL commands \? for help with psql commands \g or terminate with semicolon to execute query \q to quit falcon=> select * from m_user; id | version | user_id | password | user_name | mail | zip | address | tel | birthday --------------------------------------+---------+---------+--------------------- -------------+------------+---------------+---------+------------------+-------- ----+---------- c12445d0-5f83-42bc-bb10-6d12a642203b | 1 | falcon | fa0d1a60ef6616bb2803 8515c8ea4cb2 | ファルコン | falcon@xxx.jp | 0000000 | 大阪府大阪市xxxx | 06xxxxx xxx | 20060401 (1 row) ↑ユーザ編集画面で入力した内容が データベースに登録されていることを確認します。 ※ ただし、passwordカラムの値はハッシュ値に変換されるため、入力内容と異なります。 falcon=> \q